Latte art: The holy grail for baristas

Let’s face it – we’re used to baristas dumping steamed milk over espresso, slapping on a plastic lid and sending us on our way.

Once we’re on the road, there’s virtually no turning back. If the milk’s cold or the espresso is burnt, we deal with it.

But let’s think back to the history of coffee – a history that is marked by luxury and refinement.

The aesthetic and cultured qualities of coffee are perhaps best conveyed through latte art, a sophisticated technique of creating pictures using espresso and foamed milk.

I set out to investigate the nuances of this technique at Cornerstone in McMinnville, Ore. My mission: to find out what it takes to make latte art (and to give it a try myself).

Good latte art results from the crema (the caramel-colored foam of the espresso) and the foam (specifically microfoam) of the milk mixing together.

There are two types of latte art: free pouring and etching. In free pour, the art is made as the barista pours the milk. In etching, the barista creates the contrast of crema and foam and then draws in the image using a pointed tool.

Today, we’re learning about the free pour.

Basic tools:

-An espresso machine

-A milk pitcher with straight walls and a pointed spout.

-A 12 to 16 ounce cup.

The process:

1. Pour cold milk into the pitcher. Breve works best because of its fat content, but even nonfat can produce microfoam.

2. Insert thermometer or place hand to side of pitcher before steaming.

3. Heat until 80 degrees Fahrenheit before placing wand the side of the pitcher to aerate. Continue steaming until it reaches between 150 and 160 degrees.

4. Continue swirling the milk in its pitcher to prevent the microfoam from settling on top of the milk. Pull your shot of espresso.

5. Pour the espresso into your cup and begin pouring until the cup is half-full. Begin pulling the pitcher up as you shake it back and forth to create a rosetta design.

6. Once the milk reaches the top, pour the milk up the center of the pattern.

Art may be pretty, but it’s never too pretty to drink.

Check out my video on latte art here.

Brewing in style with the French Press

Politics aside, there’s a reason to like the French – and not just for their fries or for the Statue of Liberty.

I’m talking about the French Press, a sophisticated and simplistic brewing device that dates back to the late 1800s.

The last time I reviewed brewing methods, I briefly introduced the French Press, only indicating that it requires a slightly coarser grind than the coffee pot.

So you might be wondering if it’s a slightly different brewing method – why choose to use a French Press over a coffee pot?

There are key flavor distinctions:

-Smooth

-Earthy

-Balanced

The French Press is also the least expensive brewer available – cheers to that! And it’s the best way to control time and temperature when brewing.

This unparalleled flavor from the French Press results from the extraction time and the delivery of volatile oils, which often get caught in the paper filters.

Steps in brewing:

1. Boil the correct amount of water for the press.

2. Freshly grind the coffee. About 10 to 12 pulses of the grinder will suffice.

3. Place the coffee grounds in the bottom of the glass. Make it about an inch thick. Use more or less depending on how strong your prefer your coffee.

4. Pour the boiling water (between 195 and 200 degrees Fahrenheit) over the coffee until it fills the press.

5. Replace the plunger.

6. Set a timer for 4-5 minutes.

7. Slowly push the plunger down.

8. Pour coffee and enjoy.

Use the press to impress!

For tips from the pros, visit this video to see how a World Barista Champion brews French Press coffee.

View my slideshow of making French Press coffee here.

Learning the Classics: How to Make a Vanilla Latte

Brewing a pot of coffee at home is certainly not rocket science and also spares you some pocket change at the local drive-thru.

Those budget-conscious people who cannot part with their morning latte seem to think there aren’t any alternatives to spending $4 a day.

Wrong.

A few weeks ago, I reviewed the four primary home brewing methods and the equipment required for each. Espresso machines, however, require some elaboration.

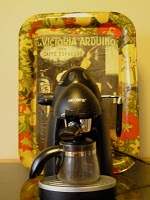
Contrary to popular belief, espresso machines are a fairly inexpensive investment. A fully functional espresso maker with a steam wand can be as cheap as $60 – or about 20 lattes.

As always, you’ll need a coffee grinder and whole beans before attempting to make espresso. You’ll also need to spend about $10 on a tamper, which is a device that helps evenly distribute and pack your espresso in the filter basket before brewing.

Once you have your equipment in place, you’re ready to begin.

The basic components of a vanilla latte include:

1. Freshly brewed espresso (two shots for 16 oz.)

2. Freshly steamed milk with foam

3. Vanilla syrup (2 tablespoons for 16 oz.)

The steps in brewing espresso:

1. Grind the espresso finely.

2. Overfill the filter basket with ground coffee.

3. Use the tamper to pack the coffee in a puck shape. Apply about 30 pounds of pressure.

4. Tap the filter basket on the counter to shake up loose espresso. Press down once more.

5. Pull the shot for no more than 10 seconds.

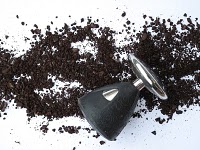
Check out the composition of a good shot of espresso here.

Put your espresso skills to the test in a vanilla latte by following my instructional video.

Here’s a preview of the final product:

Coffee Houses You Need to Visit

Seattle may be a coffee mecca, but Portland’s not far off base. Here’s a list of my favorite local coffee houses:

1. Stumptown

2. Dragonfly Coffee

3. Anna Bananas

4. Coffee Time

5. Ava

6. Rimsky Korsakoffee

7. Sip and Kranz

8. Bijou Cafe

9. Barista

10. Spella

Your coffee experience in Portland isn’t complete until you’ve visited a few of these places.

How those beans get in your cup: the roasting process

I take it for granted that I can roll out of bed in my pajamas and, with a few clicks of the grinder, have freshly ground coffee.

So, I set out to find out what exactly it takes to harness the nutty, earthy flavor in the bean—which all comes down to the roasting process.

Cornerstone in McMinnville, Ore. is a great location to investigate the complexities of the roasting process because they do it all themselves twice a week with a fire-powered Probat roaster.

Lacey, the manager, said several factors influence the final product, including:the original beanthe temperatureflavor additionsair quality Perhaps the most important tip is that the time roasting is not nearly as important as the temperature at which the beans are roasting.

The temperature of the roaster affects the beans: colorsizesurface texture Aaron, who is the roaster for Cornerstone, said roasting coffee is a lot like popping a bag of popcorn – you listen for the “pop,” count a few seconds (which vary depending on the roast) and then pull the beans. Roasters usually set the temperatures anywhere from 370 to 540 degrees Fahrenheit, again depending on the roast.

And here’s something most people don’t know: the darker the roast, the LESS caffeine it has. That’s because it is roasted at a higher temperature for a longer amount of time, extracting more caffeine.

So why doesn’t decaffeinated coffee taste like coal? The caffeine is extracted using other methods. So, whether you’re drinking a fine French roast or a nutty house blend, take time to consider and appreciate just how those beans got in your cup.

Here is an interview with Aaron at Cornerstone explaining where they source their beans, the equipment they use and factors that affect the roasting process.

This is the slideshow for the roasting process.

When life gives you Dulce de Leche, make coffee

Sometimes old dogs need to learn new tricks, so I found one – an “afternoon delight,” or Dulce de Leche coffee.

This concoction could have put me in a diabetic coma, but I’d do it again if I had to. Here’s the ingredient list:

  • Kahlua
  • Espresso
  • Heavy whipping
  • cream
  • chocolate
  • sugar

Dulce de Leche Dulce de Leche dates back to 1829 originating in Argentina and tastes like a much creamier version of caramel.

Of course, any Irish Cream creamer can substitute the Kahlua if alcohol in the afternoon will interfere with plans for productivity.

When I first saw the lineup of ingredients, I decided to start with making the whipped cream because everything else moves pretty quickly.

Steps:

1. Just pour about a half of a cup in a large mixing bowl and whisk until your arm is nearly paralyzed. Once the cream begins to thicken, add the sugar and whisk even more violently. This should take about seven minutes.

2. While the espresso (or coffee) is brewing, heat up your Dulce de Leche for about thirty seconds in the microwave.

3. Mix about 1 tbs. of Dulce de Leche with desired amount of coffee. This isn’t a science, though – if it’s too bitter, add more Dulce de Leche.

4. Then add the Kahlua (or Irish cream) – about 1 oz.

5. Top the drink with your freshly made whipped cream and sprinkle some chocolate powder on top. This beverage is coffee on steroids and is sure to please any crowd at a party.

Check out the slide show here.

Taking matters into your own hands: home brewing

After the economy tanked and trimming budgets became fashionable, people began to turn to canned coffee instead of the Starbucks drive-thru.

But your morning cup doesn’t have to taste like clay water. With an investment in the right equipment, you could be brewing like a certified barista. Heck, you could even tip yourself.

For each method, start with whole beans and a grinder:

Here’s a rundown of the three basic brewing methods:

The espresso machine This sophisticated brewing machine is by far the most advanced system. You could expect to pay anywhere from $60 to $5,000. Equipment required:espresso machine and tamp. Espresso refers to the coffee grind – it is much finer than a drip or French press grind, creating a much richer flavor.

French press The French press is a glorified coffee pot. This is how you want to brew to impress your friends, and it will only set you back between $12 and $30. Equipment required: French press and teapot.

Scoop the right amount of coffee, wait four minutes, press the filter and presto! You, too, are a coffee guru. French press coffee uses a thicker grind of coffee beans, creating a more aromatic and smooth cup o’ joe.

Coffee pot We’ve all had one at some point, but if yours is on its last leg, you could buy a new one for as little as $25. Equipment required: coffee pot.

The coffee pot grind is a happy medium and makes for a balanced cup.

Being frugal is about being smart, and you don’t need to sacrifice flavor to save.

I’ll drink to that!

Spilling the Beans

In the Northwest, coffee is more than a drink – it’s a culture. And this culture explains why we can set foot in Portland or Seattle and expect to find a café in less than a five-block radius.

Suburbs are littered with Starbucks, Seattle’s Best and Peet’s Coffee, but we don’t question the variety. As a nation, we are the largest coffee importer in the world, as stated in an article from the International Coffee Organization.

Even in a recession we’re willing to shell out $4 for a venti no-foam latté – or at least get our fix by brewing a pot at home. We are blithely consumed by a coffee culture with a curiosity about our morning cup o’ joe.

So, I’m spilling the beans. I’m a former barista and a coffee junkie with a lot of questions about the industry, the tradition and the bean. I’ll use my espresso experience and keen research skills to share news and insights on the daily grind of the coffee business.

Some topics include:

· Brewing methods

· Roasting process

· Organic beans

· Fair trade beans

· Latté art

· Coffee plantations

· Local cafés

· Coffee economics

· Coffee events

· Health benefits

So how do you take your coffee? Whether it’s with cream and sugar or just black, American adults are sipping roughly 400 million cups each day. The tradition of the coffee house has been around since the 17th century – and it’s not leaving any time soon.